Share Buttons

Thursday, September 29, 2016

48 Hours

DAY 1
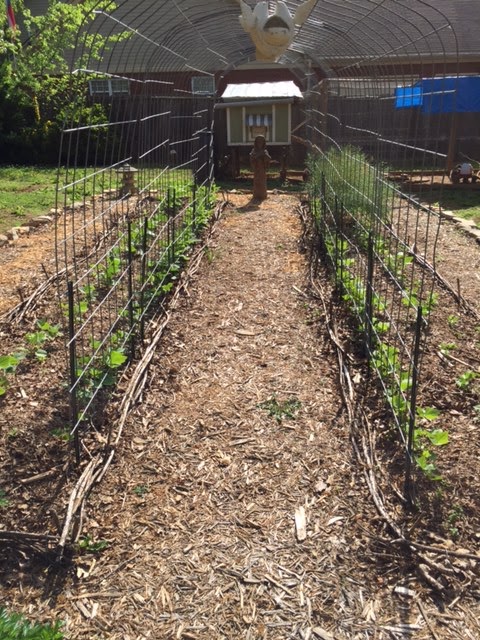
My beautiful weed garden!

I gave up at some point during the summer after harvesting beans one or two good times. Weeds sprung up and celebrated at my retreat. However, the word retreat is not quite fair as I have been working 7 days a week most of the time. The occasional day off was either due to a holiday or birthday and my garden doesn't get one of those, so it got neglected. My work has been a unique kind of struggle lately and I had the opportunity to be off two days in a row. Ergo, my garden got the spa treatment with a complete make-over. My initial plan was that I was going to reduce my garden from 3 beds down to 1 and build a rock wall out of the border that lined my overgrown garden.

Not sure if I'm alone in this challenge, but I started out with a simple plan and it turned into a million other things. Either I was procrastinating or my ADHD got the best of me as I started pruning my peach trees right after I set out to tackle the garden.
My accomplishments after day 1 was getting rid of most of the weeds from the garden and pruning the peach trees. After raking and pulling at weeds for an hour, I caved in and spent $30 on a cheap weed eater so I could save myself from a rough night of sleep. Not to mention that I'm not a fan of blisters. You know what I mean if you have ever raked leaves for an hour or so. 
5 hours of work and I was beat!


DAY 2

To start off Day 2, I finished adding the rest of the rocks to the border of my now solo garden. It took a few hours, but I was feeling the magic. After the rock border was complete, I positioned my St. Francis of Assisi statue within the border which looked beautiful. Everything just came together! Now it was time to add dirt, LOTS OF DIRT! All of the dirt I used came from the two beds that I removed. The dirt was nitrogen rich as I grew mostly beans throughout the garden this year. Correction, I grew mostly weeds, but I'm hoping there was some nitrogen remaining after the weeds went on their extended vacation.
Next came on the task of adding all of the leaf mulch so that there would be something yummy for the plants to eat next spring.

That is a lot of leaves and it will be wonderful by next year! Save your leaves!
Then I had the idea of covering the garden with a tarp so that it wouldn't grow any weeds. My other thought is that it would help the leaves compost quicker so that next spring I'll have some top notch soil. I went to Home Depot looking for a tarp and found something cheaper and better.  A black plastic sheet! I used the rocks to hold it down and I am happy with the end result. I ended up using an old tarp for some of the garden as my black sheet did not quite meet the bill. 
While I was at Home Depot, I picked a few steel rods and some cheap pvc piping to make a small green house that my tropical plants and seedlings need to survive the winter. Last winter my lemon plants lost every single leaf, which was scary. I'm hopeful this winter will be easier on my fig seedlings, pineapple plants, avocado seedling, and lemon plants. The green house was easy to make, although it looks a little sloppy, it should do the trick. It will be cramped in there for my plants, but they'll fit!
Keeping my fingers crossed and I hope this will hold me over until Spring of next year!


Sunday, June 19, 2016

Summer Beauty


My gardening style this year has been plant, watch, and pick. As work has become more of a priority this year, my passion for gardening has been muffled by job opportunity and a new member of my family. I can't say that I regret the changes, but I look forward to a time when I can get my hands dirtier than what they have been.
Delicate Bean Plant Flowering

Baby watermelon
The things that have worked in my favor is that the beans that I chose to grow have been easy to maintain as they don't require much of anything. I haven't had to water my plants because mother nature is doing her part. The saddest part of my summer was the loss of one of my chickens. I had some guilt for not realizing she was dead until 2 days after it most likely happened. Not to be gross, but summer heat + dead chicken = stank, not stink, but stank! With loss, there are new things happening as I am growing watermelons for the first time this year and I'm hopeful that they get big and juicy. 
The parsley from last year has been flowering like crazy and flies love it for some reason. I have to admit it does have a pungent odor which might be what draws the flies to it. I haven't been picking my huge collards, but luckily my chickens have been enjoying the bounty.

Her name is Rose and she is my Pest Control
My gardening style changing from having one to not having one at all has allowed lovely weeds to crop up everywhere in my once beautiful pathways.
Chives have the most beautiful flowers
Purple Bean Flower
Buttercrunch Lettuce
Smooth German Kale
Mutant Zucchini

Monday, March 14, 2016

My Secret Bean Garden

My inspiration photo
All of Fall and Winter, I have been digging through Pinterest, Facebook, Google searches, and books on how to grow vine habit beans. The simplicity of a cattle fence trellis gave me the gut feeling that I was waiting for. I remember seeing the picture, "Jackpot." This photo was saved as inspiration for what would be in my own garden. I wanted bigger and better!

The benefits of using a cattle fence trellis is that it provides more vertical grow space, easy set-up, cheap materials ($200 - my trellis is 20' in length and 7' tall), ease of access, and aesthetics that please the eye. My adventure started at one of my favorite stores, Tractor Supply, which almost came to a halt when the manager realized I was trying to haul 8ft x 50" cattle fencing on top of a Toyota Camry. I reassured him that I had a pad that would prevent them from scratching the roof of the car and that I would tie it down snug. After some convincing and small talk, he agreed to let me purchase half of the materials I needed. Once he saw that it didn't look as dangerous as he imagined, he let me buy the rest of the materials, "Phew!" Luckily is was only a 4 mile trip home and I didn't run into any blue lights. I'll be planting the beans tomorrow and can't wait to see this trellis covered in greenery.

It's that magical time of year when everything starts getting more colorful and bright as peach blossoms are blooming, plants are sprouting, chickens are pecking, and garden planning shifts into 5th gear. I kept two Smooth German Kale plants that are flowering which will provide a handful of seeds in a few months. The mini greenhouse jugs that I made with my son seem to be doing well, not perfect, but not bad.

My wife has told me that she is buying me blueberry plants for my birthday which I am ecstatic about and I'm hoping that the pruning on the peach trees I've done will help bring some fruit this year.
The chives from last  year on their second year of their biennial lifespan and they are stunningly stout. Can't wait to add some to my cooking. The parsley looks beautiful and will flower this year alongside the chives. Parsley's flowers can reach high up as far as 6' from what I have seen and heard. My lemon seedlings had a rough winter and I'm hoping they bounce back because three of the four lost all their leaves. Better get outside and get planting because I don't see any late frosts on the horizon.

Sunday, February 7, 2016

Save your Jugs!


As I have done each year, I tried something new that may be useful. After watching a video on YouTube on winter sowing containers, I immediately starting saving large milk and juice jugs. The idea of not having to run my plants outside for hours at a time each to harden them sounded appealing. This is a great project for anyone that has kids old enough to help. My four year old got his hands dirty and asked a million times, "Can I go see our plants?" That is the kind of excitement I am trying to instill in my son and it seems to be growing on him.

To start things off you will want to cut or drill holes in the bottom of your jugs for good drainage. Some people put holes on top of the jugs, but I chose not to. When separating the jug in two, cut right beneath the handle of the jug all the way around and leave a little section uncut for making it easier to tape it together at the end.
The next part is simple: Pour some dirt in your jug and if your child is helping, don't be surprised if they want to immediately get their hands dirty! For soil, it is ideal to use any seed starting mix as it is light, holds moisture, and allows for good home to birth your seedlings.

My son enjoyed wetting the seed starting mix so much, that it could have been an all day watering spree, but daddy helped a bit to speed things along. I found it useful to stir and spray at the same time as the soil is so light and airy that the water seems to run away from it at first. You could use warm water and let it sit if you don't want the experience of spraying and stirring.
Next, you plant your seed(s) by putting a hole at the desired depth and drop them in. My son was awesome at putting the seed in the hole. I was nervously watching, but he managed to put each one of the 12 seeds in the hole like a pro. Hopefully is helping me next time!
Tape them bad boys up and there you have it! They have sprouted after a week of them sitting outside in the cold and I can't wait to plant some collards. The whole family loves collards and I'll be begging my father-in-law for his recipe because his recipe is spot-on!
The garden was overhauled in about 4 hours of pulling up plants, spreading leaf mulch, and weeding. Not many green things left but parsley and two kale plants. The chickens have been enjoying a daily kale plant as of late and I donated the rutabagas I pulled up because we just can't eat through that many of them. They were delicious though, especially when prepared like French fries. The original video I watched that peaked my interest in winter container sowing is here: Winter Sowing